As the months grow colder it becomes even harder to find things to keep kids busy. This past week my hubster and I were sick and so I hunted for fun indoor activities! 
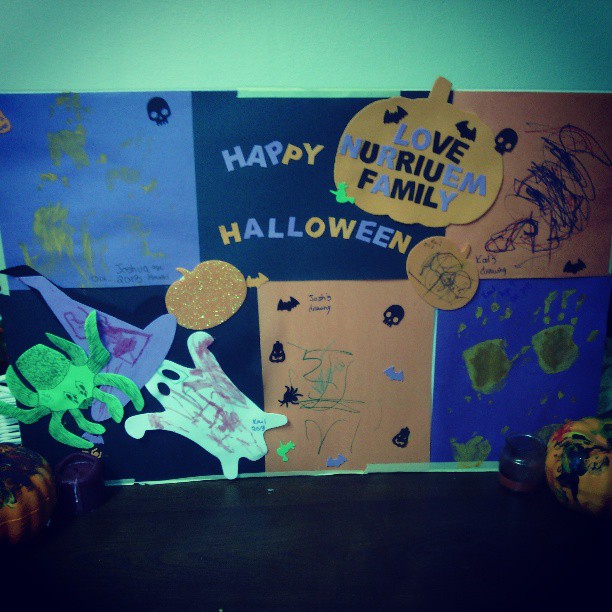
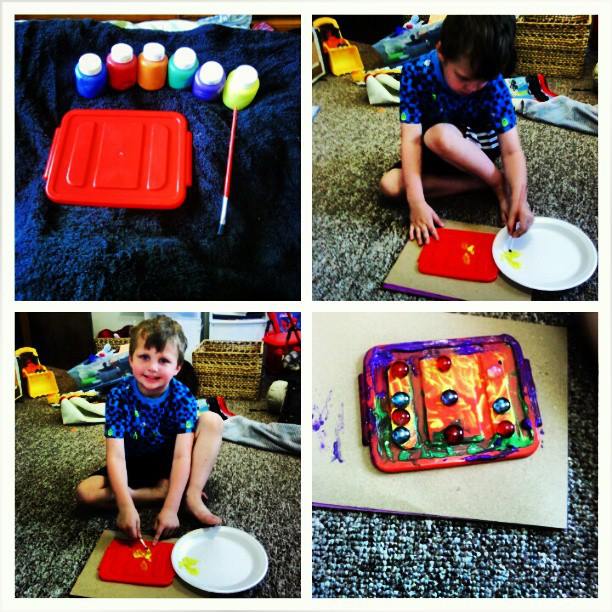
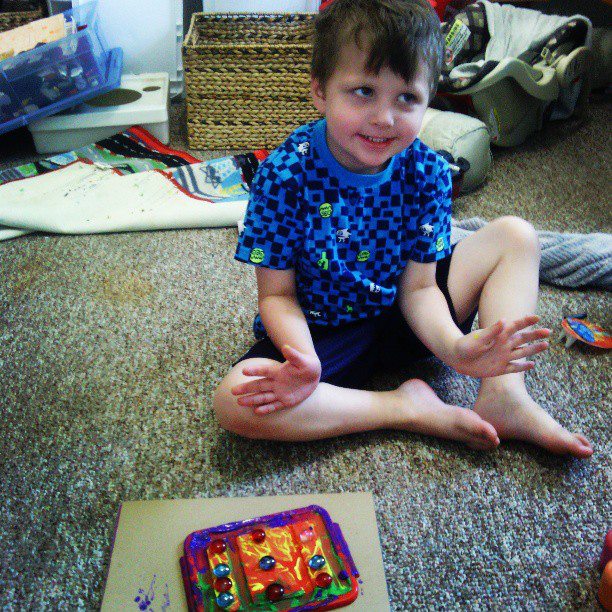
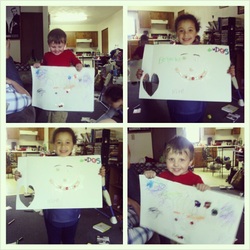
This is a Halloween craft board we made together.. We got supplies together at Dollar Tree and then assembled the individual parts to hang on our front door. The Painted Pumpkins- are an annual craft we started last year with K. It's a favorite as I painted pumpkins with my family growing up. I have them paint Dollar Store plastic pumpkins so we can save them and create a collection. 
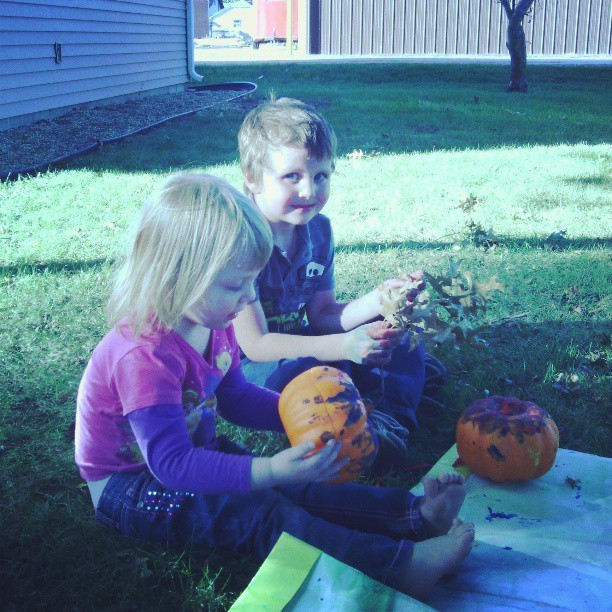
This year we invited our neighbors to join in on our fun! It was a great way to get to know them as they have recently moved to the building. 
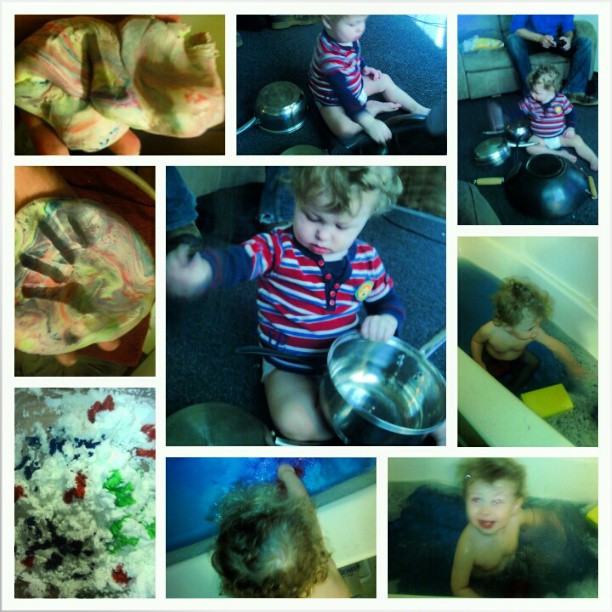
This day was so fun! We made homemade play dough food colored our bathwater, and used pots and pans as a drum set. Of these the pots and pans were J's favorite! He loves banging on walls and objects to being allowed to hit things with a kitchen utensil was heaven for him! I was pleasantly surprised by the food coloring bath! We added a few drops of food coloring and let J watch them mix together. It was fun and surprisingly didn't stain our tub (I'd had a few worried about that). 
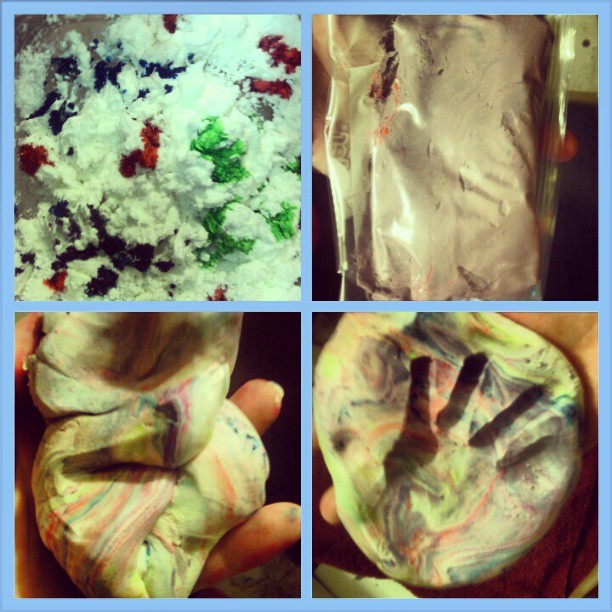
This is and probably will remain my favorite homemade play dough!! It's two parts cornstarch, one part hair conditioner. We added food coloring to ours! This was so fun! It's really very soft, I would say it's drawbacks are that it doesn't store long (I used air sealed zip locks) and it's very very messy! K was bringing it all over the house and while I didn't notice any stains, it was a pain to clean up. Keep it to a wipe-able surface! Also- not edible. 
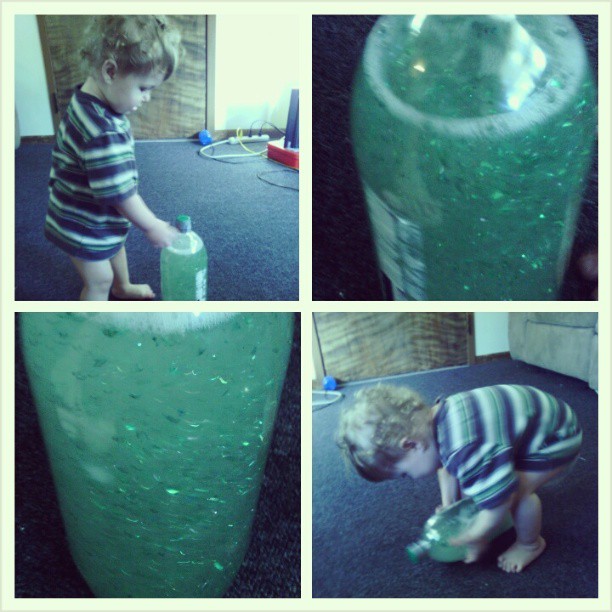
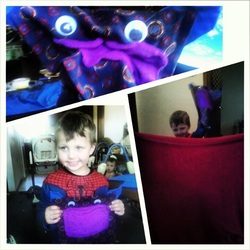
Busy Bottles! Instead of a "Time-out" bottle- this is for play. I filled it with glitter and "shiny's" then sealed it with glue and taped the top. J loved rolled it and watching everything swirl! *Please excuse the lack of pants- we're in a naked phase and have learned how to remove those! These are a few of the fun crafts and activities we've been up too lately! I've been searching for fun crafts for J that will be safe and age appropriate! Have you done any fun things with your toddler's that you'd like to share?
0 Comments
We had some complications with the birthday party! I moved the family party to a differnt weekend to accomedate our funds because our car broke down. However, being that it was his day my best friend decided to make the day special anyway. Well, being low on decorations I wasn't sure what to do to make it festive. So I took apart some "Happy Birthday" bags that we weren't using and put them up. The above photo isn't the cutest of layouts, but you can't put them up like a regular banner and it serves the same purpose. So, if you're in a pinch! These work great!! Cake decorations! My lovely friend was kind enough to make me a cake! I used cardboard to make a big one stencil and we used that for a cake decoration. (He's too little for candles so it worked). This also looks cool if you put your cut out number down and put sprikles around it. While we do intend to have a party for our circle of friends and family. It was nice to have a little something on the day he turned one. I feel so blessed to have such great friends. It was a great day!
With shows like "Twilight" and "Vampire Diaries" (I didn't say I was a fan now, don't laugh) out there, knowing your "family crest" or "coat of arms". Is "In Vogue" so to speak For Chivalry week, we decided to "Make up" a coat of arms to fly up as a part of being a Knight. Fist, we looked up our family coat of arms (more accurately, coat of arms for our last names via google) Then talked to family members who'd done geneology seraches and got too see our family coat of arms. Then, we looked into what they are made up of and what different symbols mean. We looked here: http://en.wikipedia.org/wiki/Coat_of_arms and here http://www.fleurdelis.com/meanings.htm Then we decided to make our own. I let K pick the colors and symbols he wanted to add and where he desired to place them. Then he could also decorate it how he desired. On the back (we mounted it on cardboard) I wrote what everything meant. You can use templates, I simply cut out things to paste on. The templates are fun to use as well! He chose his "Knighted Name" to "Makail the Great" and his motto to be "Batman". He chose all the colors and symbols and their placement. We made ours like a "flag". Then we talked more about what "Chivlary" actually means. We called it "The code of the knights" and how some really awesome people were knights. So, then we made him his own copy of the "code" and practiced saying it and understanding it. After this "Queen Hannah" royally knighted him while he pledged to up hold all the values and goodness. etc etc. Which made for an adorable video that I apparently cannot upload here from my fiendish mobile device! lol In his "armor" with his "Code" after being "so sworn!"
Check in soon for more actvities and fun! Coat of arms- photo credit :http://en.wikipedia.org/wiki/Coat_of_arms Every pirate needs a safe place to store the "booty" :) Today we made a treasure box keepsake. K had tons of fun decorating it. These can be done so many different ways they are perfect crafts for whatever you have already at home. Personally, if you can, I think little wooden boxes work best but anything from a small cardboard box, little tupperware container, recycled plastic containers, etc will work. I buy lots of little plastic tubs/boxes etc from Dollar Tree so we used one of those. If it's got a lid, it's good! The purpose is simply letting the child decorate it themselves, they make it special. It's their creativity that makes it shine. I prepared K's box by putting a few layers of brown paint just around the box itself, this gave him an even background to put designs on but left the box covered enough that it's contents won't be revealed. (The orginal box was clear plastic). Two coats of acrylic craft paint did the trick The lid was opaque so I left that for K to decorate. If you don't have craft paint, glue or tape paper around the "box" and have kids decorate the paper. We began with craft paint, once K had painted the lid, I used hot glue to glue his "gems" or "jewels" to the outside of his box. He showed me where he wanted them placed, (I bought these "gems" at Walmart, but you can find them at Dollar Tree or craft stores). Then he used glitter glue to add further embellishment to the lid. He didn't want to paint the sides of his box, but he did decide to have more gems around it. I used glitter glue to add his name and we're done If you're low on supplies, paper and crayons around the box will work just fine. If you don't have "gems" go on a treasure hunt for pretty rocks and (with adult oversight or total assistance) super glue or hot glue (or wood glue, gorilla glue- any strong glue- just make sure small children don't have access to it) them to the outside of the box. *COMING SOON TO EXPLORE AND EXPIREMENT: Kai (husband) and I are going to fill the treasure box with goodies, shells, coins, shiny stuff, and place the treasure box is a protective container and bury it with "X" marking the spot. Then we'll use our treasure map to find our "booty". I had been missing my kids as a working mom I miss spending the quality time with them. So, I've decided to rise earlier in the day and create theme activity weeks with something to do everyday. The first week is "Pirates" Today was our first day and it was a blast. We completed two crafts together. I used two diaper boxes and created a wearable "ship". Then we made a treasure map together. The ship: I used a diaper box, any cardboard box that will fit your child will do. We decorated the outside to look like a ship. Then I cut a hole in the bottom for his legs. Then I used a jump rope and put two further holes in the bottom, I threaded the jump rope (no handles on the jump rope) and tied it this created the "strap" to hold it up around him. We put a flag on it and named the ship. Being that his middle name is Robert, we played on his named and called him "K the dread-pirate roberts". The Map: This is super simple. We plan on hiding buried treasure later in the week to find. I kept this in mind when making the path but the rest of made up by K and I. We created our path and put in obstacles to over-come and decorated it as well. We'll follow the map later in the week when we hunt for our "buired booty". A drawing craft is about as simple as they come. It's easy, the supplies are easy and inexpensive, it's great for when you don't have a lot of materials. I have large poster board paper, it's great for when I'm low on craft activites. Being a large space kids love the idea of having that much more to work with and fill up. They are also wonderful for collage crafts. I let the kids have a variety of supplies and simply let them decorate to their hearts content. It was their space to fill, and they had a blast. For older children, using these pages have them create their own movie poster. They can be the stars of their own film and be whatever they want. If you have the option, a little creative photoshopping and printing and you can add their picture to the poster too. You're child could then really "be" a superhero or princess, snapping a quick photo while they're in their Children love being the center of attention. My step son "K" being no exception. While browsing Pinterst I came upon the idea of using tension rods to make a hallway puppet theater. First, I needed a puppet. I found an old shirt, baby wash cloth, and t-shirt scraps from a quilt I made. I cut the flannel shirt into large rectangles, then, cut out small squares from my t-shirt scraps. Using my hot glue gun, I glued the large rectangles together to form a sort of "bag" to fit over his hand. Then I folded my squares into ear shapes, glued the folds down, then glued them to my rectangle bag. It needed a mouth, so I cut a whole into the flannel and glued on my wash cloth. Then I added on the googley eyes. I'm sorry I don't have picture tutorials. It was a rather rudimentary puppet. We'll be doing sock puppets in the future and I'll post the tutorials for those. K, loved the puppet. He named it "dog". Once we had a puppet, we needed a good showcase spot,. I had the perfect size hallway, however, I lacked tension rods, I wasn't sure what we were going to do. I chose to put holes in my wall (if you don't want to deface your home, tension rods are really good to have). I used small tacks and a hammer and hammered the blanket into the wall. The holes were small and low and will probably go unnoticed by guests. K had a blast putting on his puppet show. It was a fun way to spend some indoor time. Puppet shows are perfect for rainy day inside. |
TOGETHER!
I love crafts and activities. Whether it's bonding with my kids or getting to relax and be creative. I really love it. I'd like to share some of that here with you! Archives
March 2015
Categories
All
|